Setup and test drive demo1 in SDK
We will let you test drive the same demo as shown in this video on your own Apple iOS device and PC. Here is how to set it up.
First demo example
If your custom PC program is ready and running, you can quickly configure your iPhone/iPad/iPod Touch native view to monitor and/or remotely control this program with just one or two days of focused effort. And you can do it yourself without writing a single line of code for iPhone, or for the complex iPhone-PC communication.
The best way to demonstrate the ease of the iQuipment package is to walk you through the project shown in the video step-by-step. First, let's set it up it so that you can test drive it yourself.
(From here on, we will just use the term iPhone to include iPad and iPod Touch, unless otherwise noted)
Encounter an issue
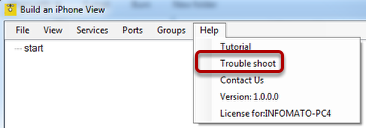
Any time if you encounter an issue, go to the iQuipment PC.exe, "help" menu and select "Trouble Shooting" from the menu items.
Launch iQuipment PC.exe
In order for your iPhone to "talk" to the Demo.exe ((a Windows application), we need an agent (iQuipment PC.exe) that can
1. provide your iPhone with an iPhone UI, and
2. pass messages between your iPhone and the Demo1.exe.
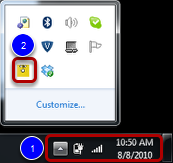
This agent resides in your PC. From the Windows System Tray (1, normally on your bottom right screen), right click iQuipment PC icon (2, yellow square) then select "Show from the menu). If you do not see this icon, go to Windows Star Menu > All Programs > iQuipment then aunch iQuipment PC from the software package.
Launch the Demo 1 application (a Windows app example)
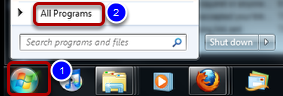
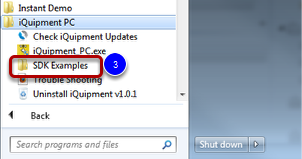
Launch the Demo.exe from the package on your PC. Start from the "Start" menu (1, above), "All Programs" (2, above), "iQuipment PC" folder (3, below), then select the "SDK Examples" folder.
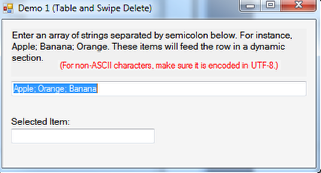
Open the "Demo1 (...)" folder. Within the project's "Bin" >"Debug" folder, double click the Demo.exe. You may need to rebuild this project if you encounter an issue to launch the executable file. You should see a pop-up window like the one shown below. This is a PC program that you will be able to remotely control from an iPhone in your intranet network.
Ultimately, you will see that as long as your iPhone can receive either a phone or WiFi signal, you can monitor and control your program from anywhere in the world. This is true even for your home PC with an dynamic IP address assigned by the ADSL or cable ISP.
If you encounter an issue...
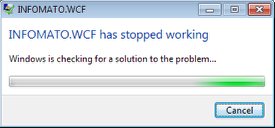
If you see an error message as shown above, this is because of not finding the Windows Communication Foundation (came with the .NET Framework 3.5). For a Windows 7 computer, open the Control Panel, "programs and Features", "Turn Windows fetrues on or off" (1, below)
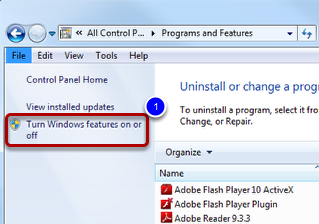
Check all the checkboxes under "Microsoft .NET Framework 3.5.1" (2, below) then click the OK button. It will take a few minutes for the OS to include the features. Reboot your computer and try launching the Demo.exe again.

Select a server name, preferably a fixed IP address.
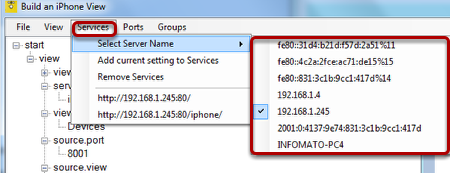
Your computer should have a unique identifier within your intranet network. Typically, it is an IP address or computer name. A sure bet would be the IP address assigned by your router. You may be surprised by how many IP addresses your computer has. Try the one that is most familiar to you first.
Click the "Services" menu (1), then "Select Server Name" from the menu items. From the sub menu, you should see a list of IP addresses (2). If you are on a home network, try the one starts with 192.168.1.xxx or 10.0.0.xxx first.
Test the server name
Do you have your iPhone handy? We will use Safari for testing purposes to see if your iPhone can see your PC on your local network. Launch the Safari browser, then enter.
http:// (the IP name you have just chosen)/iphone/hello/
(for example, http://192.168.1.5/iphone/hello/)
If you have chosen the right IP, you should see the message "Hello, iQuipment PC is now connected to your iPhone" on the browser.
Please bear in mind that your IP address is most likely dynamically assigned by the router. For now, you will need to repeat this step every time you reboot your computer or router. Later, we will show you how to get a fixed IP address from the router to eliminate this inconvenience.
If the above test failed
If the test above failed (blank message on the browser after 10 seconds), there are few possibilities:
1. To make sure iQuipment PC is configured properly, on the browser where iQuipment PC is installed, enter http:// (the IP name you have just chosen)/iphone/hello/. You should see the message saying "Hello, iQuipment PC is now connected to your iPhone." If not, check your iQuipment PC setting again.
2. Make sure your iPhone (or iPad, iPod Touch) is on the same network as the PC. Go to the settings of your Apple mobile device, ensure it is connected to the same router as the PC.
3. Blocked by Windows firewall. You need to add port exception on your Windows Firewall. For details, click the "Help" menu on iQuipment PC.exe and select "Trouble Shoot." Look for the section entitled "Connection blocked by firewall."
Connect the communication between iQuipment PC and the demo.exe
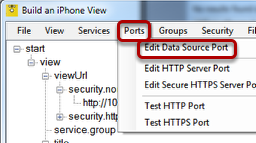
On the iQuipment PC, click the "Ports" menu, then select Edit Data Source Port. Since demo.exe is programmed to listen on port 8001, enter 8001 on the popup.
Launch iQuipment iPhone App
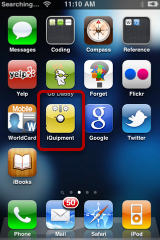
Go to the iTunes store and download the iQuipment iPhone app. Look for the icon as shown above. Launch the app.
Open the Demo1.xml file
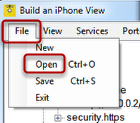
On iQuipment PC, click the File menu then select "Open" from menu items. Select Demo1.xml file.
Grab the view URL
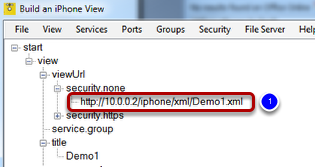
Go back to iQuipment PC.exe. Identify the viewUrl node under the "view" node as shown above (1). You will need to enter this URL on your iPhone so that it can display a UI for you to remotely control the Demo.exe.
Enter the URL on your iPhone

Enter the URL into the text field(1), then tap the "Go" key.
Test drive
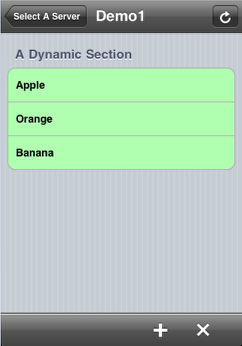
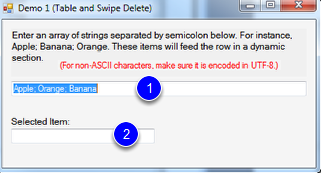
Open this video to review what Demo1 does. You should see an iPhone view as shown above. The string "Apple; Orange: Banana" in the Windows textbox(1, below) manifests into three table rows in the iPhone view (above). If you tap a row, for instance, "Apple" on the iPhone, the term "Apple" will appear in the textBox (2, below). You can try entering a different set of terms to the string in the textfield (1, below). Make sure separate them by a semicolon.
Swipe to delete
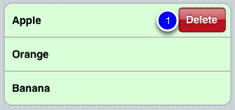
You can swipe a row, a delete button (1, red button, above) appears. It the user tapes the "Delete" button, your windows application will be notified that the user has decided to delete a row (in the example, the row that contains the term "Apple"). Your Windows application should react by removing the item from the delivery list.
Need more details on demo1?
Now you know what demo 1 does. Next, let's take a look at how to implement Demo 1 project.