Demo 10 Project (Programmably view switching)
Control the view switching from a Windows application.
What you will see
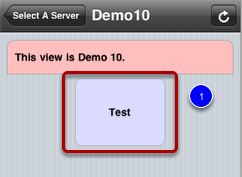
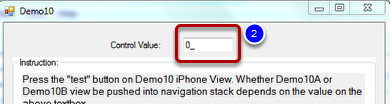
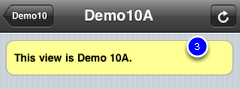
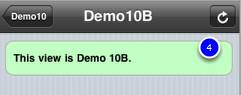
On the iOS device Demo10 view, pressing the "test" button (1, above) will lead to Domo10A (3, below) or Demo 10B view (4, below), depending on the value of the textbox (2, above) on the Demo10 Windows application.
Highlights of the code
In order to programmably control the view switching on the iPhone, we need to add a "trigger.url.dataName" sub node and assign it an exposed variable from the Windows applicaiton. Go to iQuipment PC, open Demo10.xml file. Right click the "view" node and you will see a popup as shown above. Select the "add trigger.url.dataName." Next, right click on this node and you will see another popup (2, below) for you to select an exposed data name. Pick "viewSwitching" from the pull down.
Launch Demo10 Visual Studio project from the SDK
Open Form1.cs and locate the lines below:
INFOMATO.WCF.DataExchangeService.serviceRequestViewChange(clientIP, viewName, nextViewName);
This line requests the view on the iOS device to change from the "viewName" to the "nextViewName."
Test the program
Launch Demo10.exe and enter the value of 5. Then tap the "test" button on the iOS device. Enter 15 and tap the "test" button again.