How to enhance security
There is always the fear that someone else may remotely tamper with your program ...
The default setting security
iQuipment PC listens to port 80 by default and will only accept a very limited set of predefined text message to send to the custom Windows programs that you developed. It does not have the capacity to launch or execute a program, change your system setting, or read/write files unless you deliberately map the message to perform such a task in your program. This is very different from web applications that runs on Windows IIS web server, where you may unintentionally expose your PC to a security threats due to the complexity of managing IIS.
HTTPS (SSL) Secure Communication
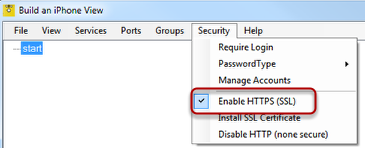
HTTPS allows private, encrypted communication between your iPhone like device and your Windows application. Our objective is not allow an uninvited visitor to sniff your identity or message content. We have the option to create and use a self-generated X.509 security certificate, and thereby avoid the expense and inconvenient annual renewal process associated with a certificate purchased from a certificate authority such as VeriSign. And for the purpose of communication encryption, a self certified X.509 certificate is just as effective. To enable HTTPS, go to the "Security" menu and select "Enable HTTPS." A dialog box will pop up.
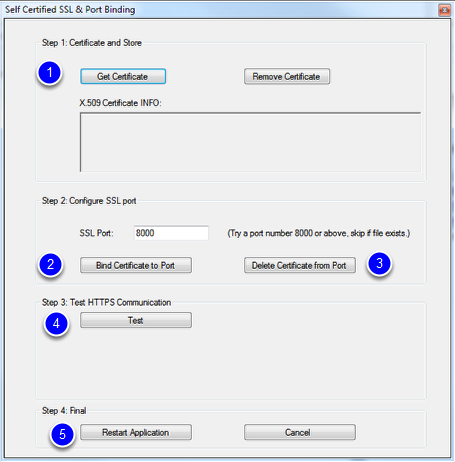
Follows the easy steps laid out in the dialog box to reuse or create an X.509 certificate (1, above), bind the certificate to a particular port (2, above). If you receive an error message, click the "Delete the Certificate from Port" button (3, above) and then try to bind again.
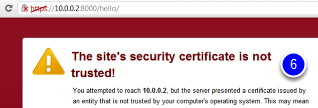
Next, click the "Test" button ((4, above) to test the configuration. If you test it with a new X.509 certificate the first time, your browser will warn you that the certificate (6, above) is not trusted because the certificate is self certified. Just grant the exception and you should see a message on your browser saying "Hello, iQuipment PC services are now available..." Finally, click the "Restart Application" (5, above) for the new setting to take affect. iQuipment PC should quit and restart itself. Occasionally, due to the Windows processes handling, iQuipment may not restart itself. Just manually relaunch it from the Windows "Start" menu.
Make sure to add the https port exception in your Windows Firewall or the incoming requests from the iPhone will be blocked. Now on you iPhone, enter the HTTPS instead of HTTP URL. Any communication through this channel will now be encrypted. To add an extra precaution, you should also turn off the nonsecure HTTP protocol by selecting "Disable HTTP" from the "Security" menu. This will prevent you from accidentally using the nonsecure channel.
Required login and device ID lock
You should always consider the risk of a third party intercepts and duplicates your requests to send to that Windows program you developed. You can elect the "require login" feature so that the user will be prompt for an account name. Only messages sent by a pre-approved user, from a pre-approved device will be accepted.
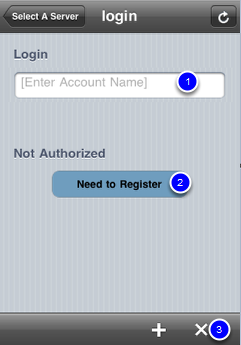
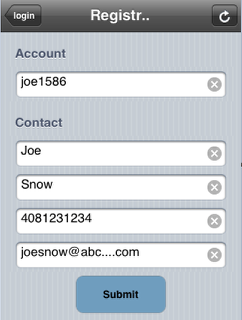
Activate require login: You can add the login requirement by selecting the "Required Login" in the "security menu" of iQuipment PC.exe. When this option is elected, the user will be prompted with a login page on the iPhone. The user has to enter a correct account name (1, above) as a password. The account name and the unique device ID are sent to iQuipment PC (on the Windows side). Only registered account names and devices will be granted access. So even if you enter a correct account name on an unregistered device, the request isn't allowed.
Quitting the iPhone application won't log out. You need to tap the cross icon (3) on the tool bar to ensure logout.
To submit a membership for a new user/device, tap the "Need to Register" button(2). A membership form will appear as follows. Contact the administrator of iQuipment PC application (same as the Windows PC admin) that a request has been sent and is waiting for his or her approval.
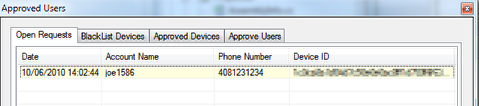
Accounts management: When the "Require Login" feature is elected, a user may submit a membership request. You (an administrator) can view all the membership requests in iQuipment PC.exe by clicking the "Security menu." Select "Manage Accounts" to see a dialog box as shown above. There are four tabs in the dialog box. Select the first tab - "Open Requests." Any unhanded requests will appear in the list. Right click a request to see a menu, where you can approve or reject the request. It is important to note that if you grant a membership request, you grant not only the account name but also the device that sent the request.
The background of each request reflects the requesting device:
1. From a new device: White
2. From an approved device: Light green
3. From a blocked device: Filtered, not shown in list
You can also block a device by selecting "Block this device" from the menu. Once a device is in the black list (forbidden), any requests made from that device will automatically be filtered out and will not appear in the "Open Requests" list.
You can make changes (for instance, revoke a membership) to the approved users, approved devices, or devices in the black list by clicking the appropriate tabs. Right click an item in the list and select the option from the menu.