Demo 8 Project (Toolbar)
Display a toolbar at the bottom of your iOS device. Tap toobar items to send commands.
What you will see
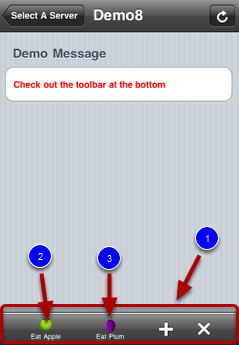
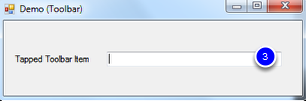
This demo shows you how to add a toolbar (1, above) to a view. The toolbar contains two custom toolbar items (2, 3 above). Their serves as a quick command for operating on the displaying view. When you tap one of the two items, the title of the item is displayed in the textfiedl of the Windows demo application. In a real application, you would want to take some action on the data of the current view.
Highlights of the code
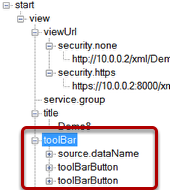
On the iQuipment PC, open the demo8.xml file. Click the "toolBar" node to expand it. In the "source.dataName" sub node, it links the "tapped item" exposed variable to which item was tapped. There are two toolBarButton sub nodes. Expand the node and you will find the source of the icons and titles.
Launch and run Demo 8 project on Visual Studio project in the SDK, Open Form1.cs. The main action happens on the following lines:
const string ExVariable_tappedItem = "tapped item";
...
void DataExchangeService_clientSetData_ID_Event(string clientIP, string viewName, string dataName, object dataValue, long processID)
{
switch (viewName)
{
case myViewName:
if (dataName == ExVariable_tappedItem)
{
//do something when iOS tries to set this exposed variable.
UpdateTextGUIObject(textBox_tappedItem, (string)dataValue);
}
...
, where the value of the "tapped item" exposed variable is assigned to the textBox when a toolbar item is tapped.